Contents
Using the AnimalTracker API, it is possible to create customized analysis plugins suited to our individual needs. On this page, optimized plugins written for two widely used methods of behavioral analysis are demonstrated from the end user's point of view. Detailed information regarding plugin creation can be found on the For Developers page.
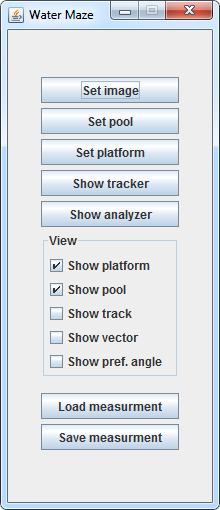
Morris water maze (WMW)
- 1. Open video source
- 2. Start Water Maze plugin (plugins > AnimalTracker > examples > Water Maze)
- 3. Click on the button.
- 4.Delineate the pool using ImageJ's oval ROI and click . Set the ratio of the inner to outer quadrants (btw. 0.1-0.9) in the appearing pop-up window.
- 5. Delineate the hidden platform using ImageJ's oval ROI and click .
- 6. To launch the tracking module, click on the button. The Tracker module will launch in a preconfigured state, therefore steps 1-4 can be skipped. Details regarding the use of the module can be found on the Tracking Analyzer module page.
- 7. After tracking is finished, click on the button to launch the Tracking Analyzer module. Past the conventional parameters of measurement (such as time or distance), the can also be calculated. Details regarding the use of the module can be found on the Tracking Analyzer module page.
- Elements to be displayed can be set using the panel.
- Individual experiments including all settings and the results can be saved () and reloaded ().
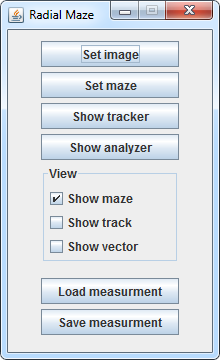
Radial maze (RM)
- 1. Open video source
- 2. Start Radial Maze plugin (plugins > AnimalTracker > examples > Radial Maze)
- 3. Click on the button.
- 4. Delineate the arms of the radial maze using ImageJ's polygon ROI. The user should always delineate the maze starting from the base of one of the arms and continuing toward the outer corners. The inner corners of two neighboring arms always touch, so there should be no extra lines connecting them. A maze with any number of arms can be delineated using the plugin. ImageJ automatically connects the first and last dots, so delineation must be finished after the last corner. When delineation is finished, click on the button.
- 5. To launch the tracking module, click on the button. The Tracker module will launch in a preconfigured state, therefore steps 1-4 can be skipped. Details regarding the use of the module can be found on the Tracking Analyzer module page.
- 6. After tracking is finished, click on the button to launch the Tracking Analyzer module. Details regarding the use of the module can be found on the Tracking Analyzer module page .
- Elements to be displayed can be set using the panel.
- Individual experiments including all settings and the results can be saved () and reloaded ().