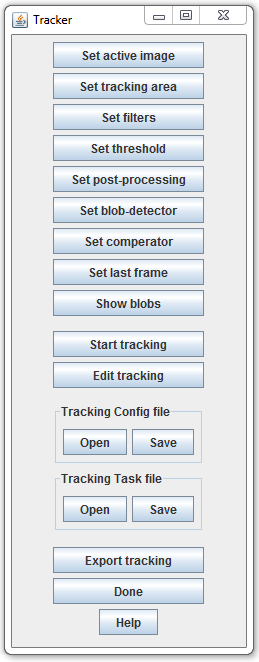
The function of the Tracker Module is the processing of the video recordings and the determination of the observed object's XY coordinates in each frame. Each frame goes through a processing chain and each step of the processing chain can be customized according to the requirements of the recording in question. Custom processing chains created for different types of recordings can be saved and used as templates for recordings with similar properties.
Processing chain
The function of the filters is to facilitate the binarization of the frames by decreasing image noise and/or removing the background. For more information, see Filters.
During binarization, separation of the foreground from the background is performed. The output image is composed of black and white pixels with no shades in between – the foreground is white and the background is black. Some of the pixels can be miscategorized, but these errors can be easily corrected using various post-processing algorithms. For more information see Thresholders.
Some of the pixels can be miscategorized during binarization. This can cause the fragmentation of the tracked object, noticeable by the appearance of flashing pixels in the frame. Errors such as these can be easily corrected by using the appropriate post-processing algorithms. For more information see Postprocessors.
During blob detection, the program searches for continuous foreground areas. Distinct continuous foreground areas are called blobs. More than one blob can be found within a single frame. For more information see Blob detectors.
The blob most closely matching the tracked object must be selected from among the identified blobs. This operation is performed by the Blob comparators, which select the most appropriate blob according to different aspects.
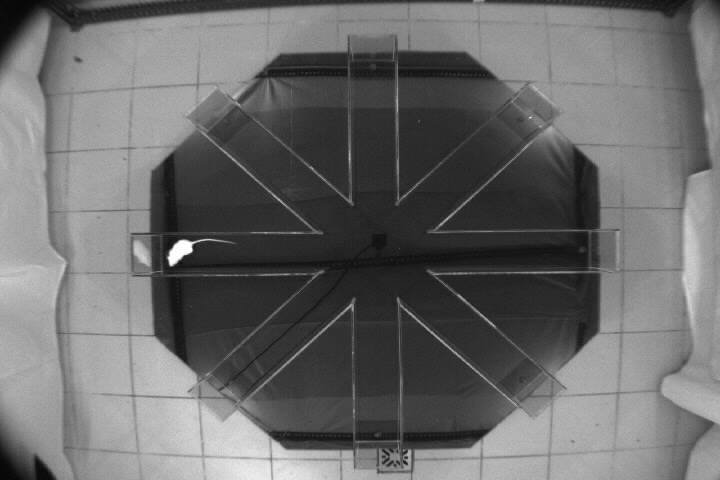
Video Frame
Usage
- 1. Open . Use the virtual stack mode to save memory.
- 2. Launch the Tracker module (plugins > AnimalTracker > Tracker module).
- 3. Click on the button. The processing window, which has an important role during the configuration of the processing chain, pops up automatically.
- 4. Click on the button and define the zone where the Tracker should search for the target. For more information, see the Zone Designer module.
- 5. To choose the appropriate filter, click on the button. For more information, see the filter selector.
- 6. To set the appropriate threshold values, click on the button. For more information, see the thresholder selector.
- 7. Different post-processing methods can be utilized by clicking on the button. For more information, see the postprocessor selector.
- 8. To set the algorithm for blob detection, click on the button. For more information, see blob-detector selector.
- 9. To set the algorithm for blob comparison, click on the button. For more information, see blob-comperator selector.
- 10. By default, tracking runs until the last frame. To end the tracking earlier, set the last frame by clicking on the button.
- 11. Move the video slider to the frame where you want to start the tracking.
- 12. To display the blobs identified in the current frame, click on the button. The blob(s) are bounded by yellow rectangle(s).
- 13. Click on the yellow rectangle framing the desired object within the Recording Window (image stack). As a result, the outline of the selected rectangle turns red. (Note that the rectangles within the Processing Window do not respond to a click!)
- 14. Click on the button to start the tracking process.
In case the tracked object is lost, click on the button to open the Track Editor.
At the end of the tracking procedure, the coordinates of the trajectory can be saved in a text file by clicking on the button.
The containing the settings in steps 5 to 9 can be saved and reopened, which can speed up the processing of similar recordings.
The containing all settings and information in steps 1 to 13 can be saved and reopened in case batch processing is required.
To end the tracking, click .